Thursday, June 13, 2013

A DIY Kitchen Chalkboard Wall

Kitchen wall before the chalkboard


While I search the internet for galley kitchen ideas during our remodel, I find that most end with a wall that has either a window or a door that leads most likely to the outside.  Unfortunately, our wall has neither.  In fact, we were lucky enough to have a wall that displays a beautiful, electrical breaker box.  Sometimes, I wonder who designed this place!

To me the wall screams for some sort of art.  I placed our magnet collection there just to give me a visual.  I considered a framed piece of art to hang over the box.  This way, we could have something pretty, but still be able to access the box.  The freezer door, however, swings right into the area.  Since we use our kitchen a lot, I really didn't want to sacrifice function for aesthetics.

Studying the space, I decided that maybe a chalkboard could be "art" and fun at the same time.  I've walked passed the chalkboard paint at Lowe's a few hundred times and have seen some really cool, local chalkboard art drawings and sayings that I thought would be great for a kitchen.  Since Al has been doing all of the remodeling work, I decided to take on this project myself.

I picked up a quart of Valspar Chalkboard paint at Lowe's for about $15.  The wall is about 8'x8'.  Lucky for me, the cabinets have not been installed on this end of the kitchen yet.  I didn't have to worry about cutting in around cabinets or taping off (I had read that removing tape could possibly pull the chalkboard paint from the wall).  I cut in the wall with a brush and rolled on the chalkboard paint with a regular, low nap paint roller.  I did not prime the white wall with dark primer.  I was just prepared to apply several coats of paint.

I let the first coat dry about 5 hours and applied the second coat.  This paint is very thick and fortunately for me, two coats did the job.  The wall was black and without the white cabinetry installed, things were looking a little dark.  I let the wall dry for three days.

I guess the most important step in this DIY project is to "season" the chalkboard.  This step is basically taking a piece of chalk and rubbing it all over the chalkboard so that when you erase you are not permanently stuck with whatever you wrote.  I must say, this process creates a TON of dust.  If you do this project inside, be prepared to clean everything in the room.  I did cheat a little by starting on a section behind where the cabinets will go.  This allowed me determine for my wall that I needed to "season" twice, wiping down with a damp cloth in between.

After that, the wall was ready to go.  I spent the next 5 hours filling the wall with sayings.  I am better at printing that drawing, so I decided to start with something I was comfortable with.

Here's how it turned out.

DIY Chalkboard wall 


For some reason, the flash accentuates the breaker box, but when you are standing in the kitchen, it is hardly visible.  I did leave some "free space" at the bottom for two reasons.  First, my 11 year old daughter, Hannah would have been upset with me if I had created a chalkboard that she couldn't write on and I thought anything below the countertops could possibly get brushed against and erased.

Now we have an entire wall of "art" and something visually appealing to a rather dead end in the kitchen.  Overall, this DIY project was much easier than I expected.  That's a first!

Maybe I'll redo the art for the holidays. Now if I can just get the rest of the cabinets! :-)

Wednesday, June 5, 2013

Venting A Condo Stove Hood To The Outside

One thing about living in the middle of a renovation is that you get to see exactly how things work in your space before you make any major decisions.

Our condo is small, but it has "open concept".  While the open concept approach makes a space feel larger, it can have a few drawbacks.  Anything that you cook in the kitchen is going to drift into the other living spaces.  Good ventilation is important in an open concept.  I quickly found this out while boiling a pot of water for pasta and had to open the balcony door to let the steam escape.

Here is what the kitchen looked like when we purchased the foreclosure.


As you can see, the microwave was an after-thought to the space.  Unfortunately, like many apartment/condo units, our kitchen was not vented to the outside.  The microwave acted as a hood to recirculate air from the cooktop.  Most over the range microwaves now come with filters to trap grease and dirty air, but we enjoy cooking and the space is so small that I really wanted to vent to the outside.

There are a few things to consider before trying to run vent ducts in an established condo or apartment building.  You will need to determine where the vent duct will run inside the unit and where will it exit to the outside.

Lucky for us, Al had done some poking around in the ceiling when we were taking out the fireplace insert and found there was good space separating our unit from the upstairs unit.  He was confident that we could run the vent duct from the hood into the ceiling and across the unit to the outside.  Another plus for us is that our unit has an enclosed balcony or porch.  The duct could exit the building from the ceiling of the porch.  This way, it would be barely visible and not interfere with the exterior of the building. I had read that some apartments in NYC run their vents out a window like an air conditioning unit.  I thought that was also a clever idea.

Al gained access to the ceiling by cutting a hole in the sheet rock inside the area where he removed the fireplace insert.


Our plan is to create a media wall with storage in this vast hole, but for now it comes in handy to gain access to the ceiling space.

There was a straight shot from the kitchen to the balcony for the duct with only a few HVAC ducts currently in the space.


A 4 inch expandable, aluminium vent duct was used to vent to the outside.

One hole was cut in the kitchen ceiling and the duct was "fished" to the opening at the fireplace.


Another hole was cut in the balcony ceiling and "fished" to the middle where the two ducts were connected.
The outside duct was capped with a self opening/closing vent cover when the fan is in use.


For the kitchen side of the vent, we had a few options.  We could either stay with the microwave over the range or install a vent hood.  Since space is limited, we decided to stick with the microwave over the range.  The set up for the range is electric.  Electric cooktops need about 400 CFMs for good ventilation.  There are a few microwaves out there that offer 400 CFM fans.  For many reasons, however, we went with the Fridgidaire Gallery series for appliances.  The microwave with this package has a 350 CFM fan.  I just make sure that I turn it on a few minutes before I need it to get the air flowing in the right direction.


Al installed a few cabinets (more about cabinets in a separate post) and hung the microwave.  Since he used a round vent duct, he had to have an adapter to fit the microwave to the duct.


The apparatus takes up most of the cabinet, but is hidden from view by the cabinet doors.


I should let you know that we did take our new cabinetry to the ceiling.  This allowed us raise the microwave and made the kitchen ceiling feel much higher.  The microwave hood is positioned 25 inches from the cooktop.  This measurement is important because if you get the hood to high, it will loose effectiveness.

Now our condo kitchen hood is vented outside!! It works great and there is hardly any steam while I'm cooking.  I can't imagine it any other way!! :-)


Thursday, May 30, 2013

We're Back......So Where Were We?

Whew!  Sorry for the quite, but things got a little crazy before the move in.   Not to mention the unpacking and living in the middle of a construction zone.  Naturally, many things went awry with the renovation, which delayed the progress of work.  Just a few to mention, water leak in master bath, peeling bathroom paint from original sheet rock never getting dusted.....you get the point.  Nothing interesting to blog about.  But I digress.

As I mentioned in a previous post, the HVAC in the condo needed replaced.  We ended up with a brand new, energy efficient, Rheem heating and air system that is wonderful and does a great job.   Total cost 3K.  Follow up from a previous post:  We did not get the UV light or the Nest thermostat.

Our HVAC system is housed in a hall closet that also contains the return.  Interior air has to pass through vented bi-fold doors to recirculate through the system.  It looks like this (without the doors).


Our installer said that the UV light doesn't add much value to the system or quality of the air.  More importantly, because of our system and return structure, the UV light would always be somewhat visible.  I did not want a constant glow from the closet, so we passed on the light.

Our installer does have a Nest thermostat on his system at home.  He gave it great reviews and said that it makes his system much more efficient and lowered his overall electric bill.  After all the details, this great little gadget did not seem like it would work for us.  The Nest thermostat actually learns patterns of how you live and adjusts your temperature accordingly.  There is always someone in our house.  This would only confuse the Nest, as it would never know if we were actually coming or going.  The installer did say that the system will not pick up pets.  So, if you are at work all day and your pet is there roaming around, the Nest still thinks you are gone.

So, we ended up with a totally new, energy efficient HVAC, but with a heavy trade off.  The 3K that we ended up spending was allocated for the kitchen cabinets!  Yep, we've been in our condo now for two months with no cabinets.

So, the renovation is still going.  The end seems nowhere in sight, but I will keep you posted as we do some cool projects. :-)

Saturday, March 2, 2013

This And That

There are a lot of little things going on at the condo.  First update, we got a quote for the HVAC system.  A completely new, energy efficient, heat pump for around 4K.  Unfortunately, this was not in our original budget, so something will have to be put on hold.  Not sure what that will be, right now.

On a better front, Al changed the heating elements in the hot water heater.  We now have hot water!  This only cost around $35 for a repair kit and a LOT of elbow grease.  If you've ever changed (or watched someone change) a heating element, you've got to have some pretty good torque to get those old elements out of there.  The old heating element was completely rusted and broke off in the hot water heater.  Nice!  Al flushed the system.  I got educated on how sediment falls to the bottom of the tank and to take good care of your water heater, it should be flushed once a year.

Work started on the ceilings.  If you've been following, you know that Al removed the popcorn from the ceiling in the entire condo.  Now it is ready to be skimmed and sanded to paint.  Since Al is a general contractor, he knows a guy that finishes plaster on historic homes in the Charleston Battery.  Hey, if it is good enough for the Battery, it is good enough for our 1100 sq. ft. foreclosure, right?  All kidding aside, this guy is amazing!  He skimmed the ceilings and it already looks brand new.


It still needs to be sanded, but it already looks great.  Unfortunately, this premium work comes with a price tag.  The quote for prepping and sanding the entire condo ceiling was 1K.  I was hoping for a few hundred less for the sake of the budget.  I know in the long run, it will be worth it.  The ceilings are only 8ft. high and you can't hide an ugly ceiling.  You can see that Al has installed recessed lights in the kitchen.  I will talk more about this in another post.

Time for the weekend warriors to get back to work.

Saturday, February 23, 2013

The Real Side Of Home Renovation

Things have been going fairly well with the condo renovation.  Progress seems to be going a at snails pace, but still on track with no major surprises - until now.  We knew it was coming.  It always does in a home renovation.

During our inspection, we suspected that the HVAC and hot water heater were going to need something. Being the optimist that I am (haha), I was hoping for a little freon and a good cleaning.  Turns out neither work properly.  Who knows with the HVAC and most likely a burned out element in the water heater (according to Al).

The HVAC service came out to inspect the HVAC unit.  It was completely out of freon and a little dirty.  The unit seems to be the original unit to the apartment/condo (optimism fading) but it was checked for leaks, filled up with freon and a good cleaning.  They would check back next week to see if the freon was holding.

You guessed it.  Theydidn't even need to wait a week.  If the freon leaks down far enough, the outside compressor will shut off as a safety feature but the inside air will still blow.  I guess I should have mentioned that this is an electric system around 15 years old.  I don't know the details.  Two days later, I turn on the system, patiently watch the outside fan (yes, I am that person) - nothing!  Al goes out and hits the reset button on the compressor and it starts.  We call the HVAC service.

Turns out there are several tiny leaks on the outside compressor.  Replace!  No holes inside.  Probably should replace anyway for energy efficiency and warranty.  Decisions.

Good news!  Al replaced one the heating elements in the hot water heater!  Next, he has to drain the water heater and replace the other - fingers crossed.

Now to make the decision about the HVAC.  This is really a no brainer.  The entire thing should be replaced.  This way, we could be energy efficient with a warranty. I also heard about a germicidal ultraviolet light that can be installed in the cooling/heating system.  The gadget looks something like this.


It is supposed to improve the quality of the air inside your house.  There are forums out there with mixed reviews.  You can find some here - Germicidal UV for cooling/heating reviews.  While I don't think this would have much of an effect on pollen and dander, I do think it might improve the overall quality of the air. I'm intrigued and plan to do more research.

Another little gadget that I've found is a thermostat called The Nest.


Hannah and I saw it at Lowe's.  The marketing video did it's job and had us fascinated.  It runs about $300 and is totally not in the budget!  It basically learns your lifestyle in about a week and sets your house temperature accordingly.  In the long run, it saves you money on your heating and air cost.  My first thought about this gadget is that it isn't for us.  Someone is always coming and going in our house.  We leave for the day, but my mother comes a few hours later to babysit our Yorkie, Cookie.  Home from school, back out, you get the idea of a busy family with kids.  I'm not sure this thing would ever learn our lifestyle.  Still, it is really cute and you can control it from your smartphone!  I guess I should mention that there seems to be some issues with it coming back on after a power outage and finding certain wi-fi routers.  Maybe we can wait for the 3rd or 4th generation when all the "bugs" are out, but it sure is cute and modern.

Sunday, February 17, 2013

Creating A Walk In Closet

One thing we knew we wanted to do at the purchase of the condo was to create a walk in closet for the second bedroom - AKA - Hannah's room.  This bedroom has access to the bathroom through a small area with two closets facing one another.  Both closest were fairly small and had the original, metal bi-fold doors.


Right Side Closet


Left Side Closet


Having two closets did offer extra space, but I thought a walk in closet would be more functional, especially for a growing girl.  Plus, so much space was wasted in the top of the closet behind the sheet rock over the doors.


Left side with doors and sheet rock removed. Already opens up the space.


Right side with doors and sheet rock removed.


Opening up the space automatically created the feel of a walk in closet.  The space already had one door going into the bathroom and needed a second door to close off the closet from the bedroom.  Today, Al framed a door on the bedroom side creating the walk in closet.


Now he needs to hang sheet rock and a door.  The plan is to customize the inside for a great walk in closet with access from both the bathroom and bedroom.  I will reveal before and after when it is complete.

Saturday, February 16, 2013

Demo Continues

I may be getting too old for this.  Most of the work is being done on the weekend because Al and I have real jobs to go to during the week.  Since we are in a condo, there is a time limit in the evening that we can make noise. That makes after hours work limited.  Needless to say, things are going a bit slow for my high paced mind.

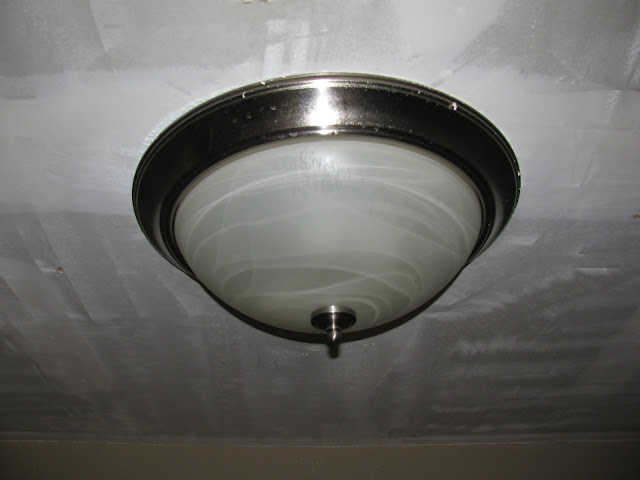
On a different note, Al was not looking forward to moving the disgusting, filthy appliances and cabinets down the stairs and hauling them off.  He decided to post them to the "free" category on Craigslist.  Amazingly, before he could recheck the post, he had FIVE responses to come and get them!  The next day, two guys showed up and hauled off old appliances and cabinets - for free!  This really helped with the disposal budget (free is always nice on a budget).  I think I'm going to try to sell the matching kitchen and dining room light on Craigslist.  They are still available to purchase new at Lowe's and are in good condition.


We also got a chance to meet with the engineer.  He poked his head around in the ceiling in several places and feels that taking out the fireplace will not be a big deal.  Yippee!!  Since we are in a condo, I spoke with the HOA coordinator, Valerie, and she says that the engineer will need to draft a letter.  She will submit the letter to the HOA board.  They will sign off and approve the removal of the fireplace.  She also said they may want to come out and take a look before signing off.  More waiting, but really glad that the fireplace can be removed.

Today, I'm going to sand interior doors.  We bounced back and forth the idea of using the old doors and hardware or purchasing new.  Since this is a condo renovation on a shoestring budget, we made the decision to try and salvage everything possible.  The doors are solid and plain with simple brushed nickel hardware.  This should be nice for the modern decor that we are going for.  Plus, they are in good condition.


My job today is to take down the high spots and get them smooth.  I will be using a power hand sander with fine and ultra-fine grit.  Thankfully, there are only seven of them!